 New York Know
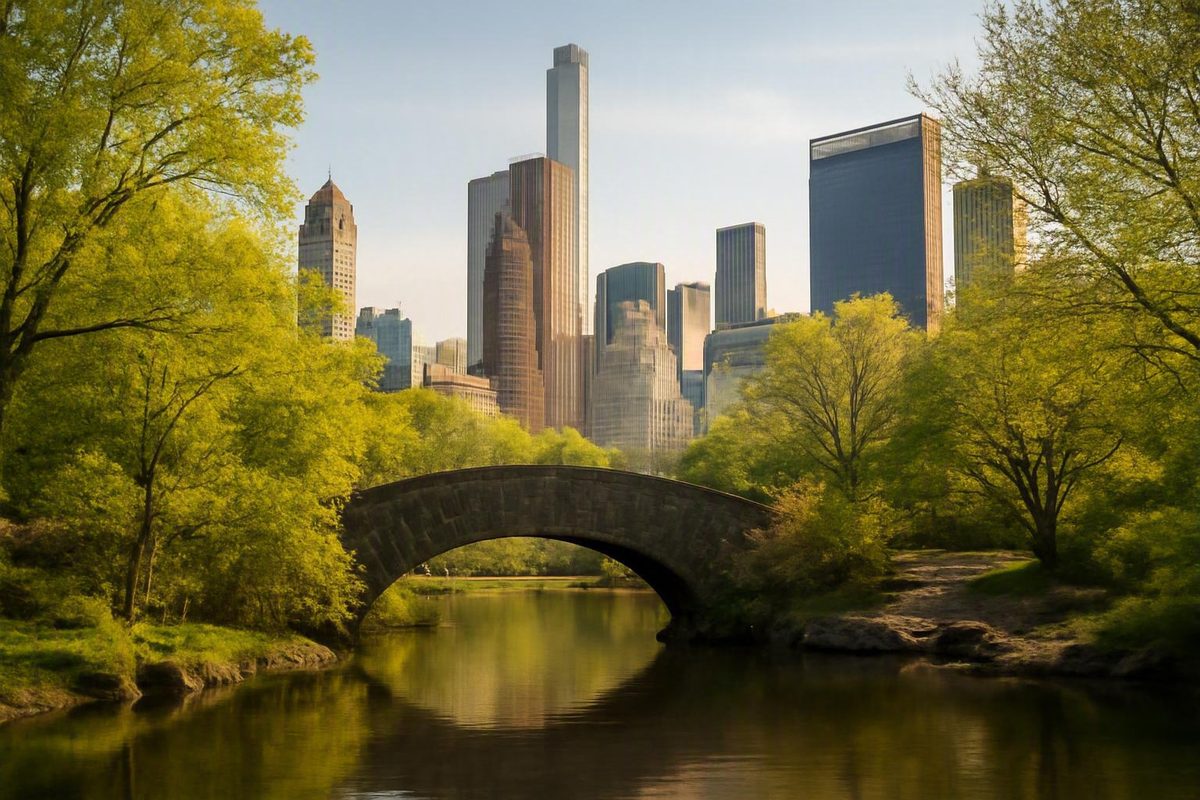
New York City offers many beautiful places to take pictures, but the most famous background is not automatically the most useful one. Central Park offers greenery, water, bridges, and formal landscapes. Top of the Rock offers an elevated perspective, and Times Square supplies unmistakable street energy.
The better question is not “Which location is best?” It is “Which setting, atmosphere, and amount of public attention suit the photograph I want to make?”
This is a curated New York City shortlist rather than a comprehensive or evidence-based ranking. It focuses on six visually distinct settings and shows how to group them into manageable walking plans. It is primarily an inspiration and route-planning guide, not a directory of current access rules. Confirm admission, closures, accessibility, permits, equipment policies, and other operational details with the responsible authority or venue before your visit.
How to Choose the Right New York Photo Location
Start by comparing visual categories instead of searching for an objective winner.
| Location | Primary visual category | Particularly useful for | Main planning tradeoff |
|---|---|---|---|
| Central Park | Greenery, water, bridges, stonework, and formal landscapes | Portraits, proposals, travel pictures, and nature within Manhattan | The park is extensive, so the meeting point and walking sector must be clear |
| DUMBO | Historic urban character and waterfront streets | Architecture, environmental portraits, street details, and neighborhood storytelling | Busy surroundings may require local changes in angle or framing |
| Brooklyn Bridge Park | Waterfront skyline | Skyline portraits, cityscapes, and travel memories | Open-air conditions and pedestrian activity can shape the result |
| Brooklyn Bridge | Bridge architecture and walking experience | Structural compositions, landmark pictures, and travel sequences | The shared route offers less control over passersby and stopping space |
| Top of the Rock | Elevated skyline | Empire State Building compositions and broad city views | The result depends on visibility, venue conditions, and current visitor policies |
| Times Square | High-energy street scenery | Illuminated signs, crowds, movement, and urban travel pictures | Little privacy and substantial competition within the frame |
These categories are more useful than labels such as “most beautiful.” A portrait subject who wants trees and a calmer visual field may prefer Central Park. Someone who wants masonry, street perspective, and waterfront context may choose DUMBO. A visitor whose priority is seeing the Empire State Building within the skyline may find a separate elevated viewpoint more useful than standing in the building itself.
Before choosing a destination, define the purpose of the photographs:
- Casual travel memories: Favor a setting that already fits the sightseeing plan.
- Portraits: Consider how the subject feels about crowds, walking, weather, and being watched.
- Skyline photography: Decide which building or skyline layer should dominate.
- Architecture: Look for structural lines, textures, scale, and sufficient room to compose responsibly.
- Street scenes: Choose a location where movement and visual unpredictability help rather than hinder the picture.
- A proposal or personal moment: Put emotional comfort, navigation, and contingency planning ahead of landmark recognition.
Then evaluate the options with six practical criteria:
- Desired scenery. Do you want trees, water, stonework, bridge structure, skyline layers, illuminated signs, or active streets?
- Crowd tolerance. Are passersby part of the atmosphere, a manageable inconvenience, or a serious distraction?
- Comfortable walking distance. Consider footwear, mobility, equipment weight, children, formal clothing, and the rest of the day.
- Ease of navigation. A visually appealing point is not useful if participants cannot find it or the group becomes separated.
- Weather exposure. Parks, waterfronts, bridges, streets, and controlled venues create different planning needs.
- Comfort with public photography. Some people relax in an active setting; others become self-conscious when strangers look or pass through the frame.
No location guarantees flattering light, privacy, small crowds, clear weather, an unobstructed position, or a particular photographic result. Build the plan around what you can control: geographic proximity, one clear priority, a precise meeting point, manageable equipment, and alternatives that do not require crossing the city.
Central Park: Greenery, Water, Bridges, and Formal Settings
Central Park provides the broadest visual range in this shortlist. New York Know’s published Central Park material identifies possible settings that include a recognizable bridge, stone arches, the Lake, a formal garden, and a wooden shelter. Together, those elements support pictures that can feel natural, architectural, romantic, formal, or quietly observational.
The park’s variety is also its central planning challenge. “Meet in Central Park” is not an adequate instruction for a portrait session or an important personal moment. Choose one precise primary point and one nearby alternative before entering the park.
Choose the backdrop before choosing the point
Organize the possibilities by what should dominate the frame:
- Bridge and water: Useful for layered depth, reflections, and a recognizable park setting. A person can be framed against the water, placed within the approach to the bridge, or photographed more broadly as part of the landscape.
- Stone architecture: Arches and masonry support stronger lines, texture, and a more formal urban mood. These elements can frame a portrait or become the primary architectural subject.
- Formal planting: A structured garden setting suits polished portraits and personal occasions that call for a deliberately composed atmosphere.
- Wooded scenery: Trees and less formal paths create a softer result in which the park feels more natural than monumental.
- Sheltered structures: A wooden shelter can add shape and texture to a composition, although it should not be assumed to function as a reliable severe-weather venue.
The desired emotional tone matters as much as the physical background. A recognizable landmark can establish the location immediately, but it may also bring more public attention. A quieter-feeling garden, path, or lakeside composition may be less iconic while giving a portrait subject or couple more room to concentrate on each other.
New York Know’s Central Park planning framework recommends matching the setting to the people involved and preparing an exact primary point, a nearby crowd alternative, a separate severe-weather response, sufficient walking and transit time, and a communication procedure.
Build a coherent park sector
Treat the park as a collection of potential sectors rather than one continuous photography route. The primary composition, secondary backdrop, crowd alternative, and intended exit should remain reasonably close together, especially when another reservation or scheduled activity follows.
A simple visual sequence might begin with the essential bridge-and-water picture and then move to nearby trees or stonework. Another could begin in a formal setting and finish with a less structured portrait among greenery. The secondary photograph should contrast with the first without requiring a long search for another landmark.
This approach also makes the meeting point easier to communicate. Instead of telling participants to wander until they find the photographer, share one exact arrival location and explain what happens if the preferred composition is occupied.
Use a local crowd alternative
A crowd alternative should preserve the purpose of the photograph, not necessarily duplicate the original frame.
If the priority is a portrait with greenery, a nearby wooded view may work even if the initial plan involved a bridge. If water is essential, change the angle or foreground rather than leaving the area. If a particular structure is the subject, simplify the composition or wait only as long as the schedule reasonably permits.
The important distinction is geographic: a nearby path or alternate angle is a crowd response. A distant location elsewhere in the park is a new itinerary.
Keep severe weather separate
Another exposed path is not a true severe-weather alternative. Plan that response independently. Depending on the circumstances, it may mean rescheduling, shortening the outing, or using an indoor location that has already approved the proposed activity.
Do not assume that a museum, library, hotel, shop, restaurant, or historic interior permits organized portraits or substantial equipment simply because visitors may enter. Indoor-location guidance recommends contacting the owner or staff before bringing clients or gear because admission, fees, conditions, and photography policies vary (review the indoor-location permission guidance).
Before leaving, confirm current closures, accessibility, facilities, reservations, permits, boating availability, and setup restrictions with the relevant park authority or venue.
DUMBO: A Compact Waterfront Neighborhood for Urban Pictures
DUMBO suits photographers who want an urban waterfront environment rather than park greenery or an elevated observation setting.
Approach the neighborhood as one compact walk rather than a disconnected checklist. New York Know’s DUMBO route guide recommends treating the area as a waterfront progression instead of a collection of isolated stops.
Begin with neighborhood architecture
Use the first part of the walk for street-oriented pictures. The dominant visual ingredients are building texture, repeated architectural lines, framed street perspectives, and the relationship between a person and the surrounding urban scale.
This environment works particularly well for:
- Environmental portraits in which the neighborhood remains legible
- Architectural studies built around line, texture, and depth
- Travel pictures that show movement through the area
- Street details that establish visual context before the waterfront appears
A visually rich street can also become cluttered. Before placing a portrait subject, inspect the entire background. Signs, vehicles, building edges, pedestrians, and distant structures may all compete with the face. Moving closer, lowering or raising the camera, changing the subject’s position, or waiting briefly may simplify the result without abandoning the street.
Avoid making one famous composition the test of whether the visit succeeds. The neighborhood’s value lies in the number of related urban elements available within one area. If a preferred point is occupied, a nearby change in wall, angle, distance, or perspective can still produce a coherent picture.
Let the waterfront change the visual scale
As the walk approaches the waterfront, the composition can open outward. Street detail gives way to water, broader skyline context, and a stronger sense of distance. This creates a natural photographic sequence:
- Close architectural details
- Environmental street portraits
- Transitional views between buildings and open space
- Waterfront compositions with skyline context
The sequence gives a set of photographs visual development. The neighborhood establishes texture and enclosure; the waterfront supplies space and city scale.
Do not depend on a particular viewing position being empty or on the surroundings matching photographs seen online. Instead, identify what must remain in the image: the portrait subject, a piece of bridge architecture, a skyline layer, the water, or the neighborhood itself. Less important details can change.
Adjust within the neighborhood
DUMBO’s practical advantage is not a guarantee of unobstructed views. It is the ability to change the composition locally while retaining the same urban-waterfront character.
For casual travel pictures, keep moving and photograph the progression rather than repeatedly searching for exact recreations. For a more organized portrait session, scout the intended walking line and identify places where the group can pause without blocking entrances or circulation.
Those three settings are close enough conceptually to form one photographic outing, but they should not receive equal weight. Choose the main picture first, then let the others support it.
Brooklyn Bridge Park and the Brooklyn Bridge: Skyline and Structural Views
Brooklyn Bridge Park and the Brooklyn Bridge create related but distinct pictures.
It is the stronger option when the city across the water, an open foreground, or a person within a wider landscape should lead the composition. New York Know describes Brooklyn Bridge Park as a leading park alternative for skyline views—an editorial recommendation rather than an objective ranking.
The bridge changes the visual emphasis. Its structure, repeated lines, architectural scale, and the experience of crossing become part of the subject. Instead of looking toward the city from an open waterfront setting, the photographer works within a major piece of urban infrastructure.
Decide what the photograph is about
Choose one of three priorities before beginning:
- Skyline: Buildings and the broader cityscape should dominate.
- Waterfront: Water, shoreline, open space, and skyline should work together.
- Bridge structure: Architectural lines and the walking experience should carry the picture.
That choice determines how to use the cluster.
If the skyline is the priority, give the strongest attention to the park and use the bridge as a shorter travel sequence. If the bridge is the subject, preserve enough time and energy for its structure rather than exhausting the group with a long waterfront session first. If the waterfront relationship matters most, balance open space, water, subject, and skyline instead of allowing the bridge to dominate every frame.
Change the foreground to change the story
A skyline picture does not have to treat distant buildings as the only subject. The foreground can determine what the image communicates.
- An open waterfront foreground emphasizes distance and city scale.
- A person in the foreground turns the skyline into travel or portrait context.
- A piece of bridge structure makes the image more architectural.
- A walking sequence emphasizes movement through the city.
- A tighter frame can isolate structural rhythm without trying to show the entire landmark.
This is the main visual distinction between the park and the bridge: the park gives the skyline room, while the bridge introduces stronger lines, enclosure, and movement.
Treat the three areas as one cluster
A logical visual progression begins with enclosed neighborhood streets, opens toward waterfront scenery, and finishes with bridge architecture. The route can also be reversed when the bridge is the principal subject or when the day’s broader itinerary makes another order more sensible.
Do not turn the cluster into a race to collect every angle. One category should remain primary, one secondary, and one optional.
Keep people and equipment out of shared circulation routes. Use established public spaces, keep bags and equipment close, and move on when a composition cannot be made without obstructing others. Do not use roadways, restricted structures, private property, or unverified elevated positions for a more dramatic angle.
Requirements can vary by location and by the nature of the activity. Before an organized session, confirm current park, bridge, portrait, tripod, lighting, drone, and commercial-photography policies with the responsible authorities.
Top of the Rock: An Elevated View With the Empire State Building in the Frame
Top of the Rock is the shortlist’s elevated skyline option. New York Know says it may suit visitors who want the Empire State Building to dominate their skyline photographs and also associates the viewpoint with a clearer perspective over Central Park (read the direct Top of the Rock comparison).
That is a bounded editorial recommendation, not a promise of clear weather, a particular sunset, an unobstructed position, or the objectively best view in New York.
Photographing from a landmark versus photographing it
The central compositional tradeoff is simple: when you are inside or on a famous building, that building is generally not the exterior subject of the skyline photograph.
A separate elevated viewpoint allows the Empire State Building to remain part of the cityscape. That can make Top of the Rock useful when the intended picture depends on the relationship between the building and the surrounding skyline.
Use the desired image to frame the decision:
- Do you want to photograph the Empire State Building within the skyline?
- Is the experience of visiting that building more important than including its exterior?
- Is an elevated Central Park perspective important?
- Is the skyline itself the priority, or is the observation experience equally significant?
This avoids an unhelpful argument about which attraction is universally better. The appropriate choice depends on whether the landmark should be the viewpoint or the subject.
Build flexibility into the composition
An elevated photograph can depend heavily on distant visibility. Do not design the entire visit around one narrow result. If clouds, haze, reflections, or other visitors affect the intended frame, look for other visual relationships:
- The Empire State Building within a wider skyline
- Layers of buildings at different distances
- Central Park as part of the broader city pattern
- A travel portrait with the skyline as context
- Architectural details within the permitted visitor environment
Carry only equipment that you can manage comfortably and that the venue currently allows. Before visiting, consult the venue directly about admission arrangements, reservations, accessibility, weather procedures, closures, tripods, and other equipment restrictions. The available sources do not establish those current operational details.
Times Square: A High-Energy City Setting
Times Square represents the opposite of a quiet natural background. New York Know includes Times Square among the core experiences it identifies for a first New York visit.
That energy can be the subject of the picture. It can also make portrait composition and personal comfort more difficult.
Decide whether activity helps the image
Times Square works when the surrounding activity supports the intended story. A travel photograph can use visual density to communicate the pace of the city. An environmental portrait can place the subject within a crowded public setting. A street picture can incorporate overlapping signs, gestures, movement, and changing relationships.
The same characteristics can work against a formal portrait. It is not a privacy-oriented setting.
Ask the person being photographed:
- Are crowds part of the atmosphere they want?
- Are they comfortable posing while strangers pass or watch?
- Can they remain relaxed when the background changes?
- Is the goal a clean portrait or an energetic record of place?
- Would a simpler urban background support them more effectively?
If activity is essential, allow it to remain visible rather than fighting for an empty frame. If it is not essential, another urban setting may better serve the photograph.
Choose one dominant visual relationship
In a visually intense environment, trying to include everything usually weakens the picture. Choose one primary relationship:
- Subject against an illuminated sign
- Subject within a stream of movement
- Human scale against surrounding architecture
- A broad scene in which the crowd supplies context
- Reflections or color relationships created by artificial light
Then simplify around that choice. Change camera position, subject distance, or framing rather than trying to control the entire setting.
Do not depend on a supposedly universal quiet hour or guaranteed lighting conditions. Time of day, surrounding activity, weather, exposure, reflections, and the brightness difference between signs and faces can all influence the result.
For severe weather, identify a nearby indoor possibility before the outing—but use it only after checking admission and photography policies. A visually appealing lobby, shop, museum, library, hotel, or historic interior is not automatically available for an organized portrait session.
Turn the Locations Into Walkable Photo Routes
A strong New York photography day groups nearby subjects rather than treating every famous location as a separate obligation. New York Know’s stated planning approach focuses on choosing a base, grouping sights by area, and building days that make sense on foot (see its neighborhood-first planning principles).
Use that approach to build one of three flexible route templates. These are not timed itineraries. Actual route length should reflect weather, mobility, equipment, reservations, and the pace of the people involved.
Central Park route
Priority photograph: Choose one exact composition based on bridge and water, stone architecture, formal planting, woodland, or a sheltered structure.
Secondary setting: Select a contrasting background within the same park sector. If the priority uses architecture, the secondary picture might use trees or water.
Nearby crowd alternative: Choose another established path, angle, or open position that preserves the intended mood without requiring a long relocation.
Enter through the side of the park that serves the priority point. Make the essential photograph first. Add the secondary backdrop only if the group remains comfortable and the schedule is intact. If another activity follows, begin moving toward the appropriate exit rather than adding a distant landmark.
DUMBO–Brooklyn Bridge Park–Brooklyn Bridge cluster
Priority photograph: Choose neighborhood architecture, waterfront skyline, or bridge structure.
Secondary setting: Select one of the remaining categories.
Nearby crowd alternative: Identify another street perspective, waterfront angle, or established public position within the cluster.
A natural visual sequence begins with DUMBO’s urban enclosure, opens into Brooklyn Bridge Park, and finishes with bridge architecture. Reverse the order if the bridge is the primary subject.
Do not make all three components equally important. If the waterfront skyline is the purpose of the outing, protect time and energy for it. If the bridge is essential, avoid turning the neighborhood and park into two complete sessions beforehand.
Midtown route: Top of the Rock and Times Square
Priority photograph: Choose either an elevated skyline with the Empire State Building in the frame or a high-energy Times Square scene.
Secondary setting: Use the other location only if current venue arrangements, weather, and the group’s energy make the pairing reasonable.
Nearby crowd alternative: For the street portion, choose another nearby public composition that provides an urban background without depending on one corner. At the elevated venue, the practical alternative may be another composition within the area visitors are currently allowed to use.
If the observation visit involves a fixed entry arrangement, let that commitment anchor the route. Times Square can remain the more flexible street component, but it should not jeopardize a scheduled activity.
Adjust the route to the people
A route that looks compact can feel much longer when someone is wearing formal shoes, carrying lenses, managing children, using a mobility aid, or stopping frequently for pictures. Wind, rain, temperature, and heavy bags can also affect pace.
Build walking, entry, and transit buffers without relying on a rigid minute-by-minute plan. Share the order of locations and decide in advance what will be dropped first if the day runs late. Removing the secondary stop is usually more useful than rushing through the priority photograph.
Light, Weather, Permission, and Respectful Photography
A photogenic setting is only one part of a successful picture. Light, weather, access, equipment, public behavior, and contingency planning can influence the outcome just as strongly.
Match the light to the subject
There is no universal best hour for all six locations. Time of day can change the direction and character of light, the appearance of illuminated signs, and the movement of people, but the useful choice depends on the intended subject.
Early morning may suit a composition that benefits from lower-angle daylight or reduced surrounding activity. Sunset may suit a waterfront or skyline when weather and viewing direction cooperate. Night can support illuminated streets and reflections. Photographer Jim Nix’s location-specific examples recommend different periods for different subjects, illustrating the broader principle that timing should follow the composition rather than a universal formula (see the conditional timing examples).
When a particular lighting relationship matters, scout the viewing direction in advance. For a casual visit, remain flexible and photograph the conditions that exist rather than treating the outing as unsuccessful because it differs from an image seen online.
Separate snapshots from organized production
Do not assume that ordinary visitor photography and a larger organized shoot are treated in the same way. The relevant authority or property owner may distinguish among:
- Handheld travel snapshots
- Organized portrait sessions
- Commercial photography
- Tripods or stands
- Off-camera lighting
- Reflectors or large modifiers
- Props or furniture
- Drones
- Wardrobe changes
- Large groups or crews
Before leaving, consult current official information about admission, reservations, closures, accessibility, permits, equipment restrictions, and commercial activity. If the responsible authority or owner is unclear, ask before bringing clients or substantial equipment.
Indoor properties require particular care. Visitor access does not necessarily answer whether posed sessions, tripods, lighting, clients, or commercial work are allowed. Request permission and respect any fee, condition, time limit, restricted area, or refusal.
Photograph shared spaces respectfully
Keep the session proportionate to the space:
- Keep sidewalks, bridge routes, park paths, entrances, stairs, and viewing areas clear.
- Use established public areas rather than restricted, private, or operational spaces.
- Keep equipment close and under control.
- Move discussions and wardrobe adjustments away from circulation routes.
- Do not disrupt worship, ceremonies, performances, or business operations.
- Follow staff instructions.
- Do not assume a recognizable stranger wants to become the central subject of a portrait.
- When photographing a particular person is essential to the image, seek consent where practical.
Street scenes may naturally include people within a wider environment, but ethical judgment still matters. Avoid treating distress, vulnerability, work, worship, or private interaction as visual material simply because it is visible.
Build three different contingencies
A resilient plan includes:
- A nearby crowd alternative: A local composition that preserves the photographic purpose when the preferred point is occupied.
- A separate severe-weather response: An approved indoor option, rescheduling rule, shorter route, or decision to cancel.
- A communication procedure: A fixed meeting point and clear instructions if messages fail, someone is delayed, or the group becomes separated.
Indoor and outdoor settings solve different problems. Outdoor locations provide movement, seasonal context, and broader scenery. Indoor settings may provide more environmental control and resistance to weather. Neither is universally better; the choice should reflect the people, desired look, and conditions.
Pre-departure checklist
Save this list on your phone:
- [ ] Define the one photograph that matters most.
- [ ] Confirm the exact primary meeting point.
- [ ] Choose one nearby crowd alternative.
- [ ] Prepare a separate severe-weather response.
- [ ] Check current admission or reservation arrangements.
- [ ] Confirm closures and accessibility information.
- [ ] Verify policies for organized portraits, tripods, lighting, drones, props, and commercial work.
- [ ] Request permission for private or controlled indoor property.
- [ ] Review the route against footwear, mobility, children, and equipment weight.
- [ ] Add walking, entry, and transit buffers.
- [ ] Set a meeting point and communication-failure procedure.
- [ ] Decide which secondary stop will be dropped if the route runs late.
- [ ] Pack only equipment that is permitted and comfortable to carry.
- [ ] Keep entrances and circulation areas clear.
- [ ] Accept that light, crowds, weather, and visibility cannot be guaranteed.
Frequently Asked Questions
Where can I photograph the Empire State Building as part of the skyline?
Consider Top of the Rock if the Empire State Building should remain prominent within the skyline composition. The central tradeoff is that photographing from another building lets you include the Empire State Building’s exterior, whereas visiting the Empire State Building emphasizes the experience of being there.
Consult the venue directly for current admission, reservation, accessibility, visibility, equipment, and closure information. An elevated visit does not guarantee clear weather, a particular sunset, or an unobstructed position.
Which featured NYC location offers the widest variety of natural and architectural backdrops?
Central Park offers the broadest visual range in this shortlist. The settings identified in New York Know’s published material include water, a recognizable bridge, stone arches, formal planting, wooded scenery, and a wooden shelter.
Because the park is extensive, choose one primary point and one nearby alternative within the same sector. This is especially important when another scheduled activity follows.
Can DUMBO, Brooklyn Bridge Park, and the Brooklyn Bridge fit into one photo outing?
Yes. They can form one geographic and visual cluster rather than three unrelated trips. A practical sequence begins with DUMBO’s urban streets, continues toward Brooklyn Bridge Park for waterfront and skyline context, and then incorporates the Brooklyn Bridge as an architectural subject or walking experience.
Choose one priority—neighborhood architecture, waterfront skyline, or bridge structure—and treat the others as secondary or optional.
Do I need permission to take portraits or use photography equipment?
Requirements depend on the location, property owner, activity, and equipment. Do not assume that ordinary visitor access answers whether an organized portrait session, commercial production, tripod, lighting setup, drone, prop, wardrobe change, or large crew is permitted.
Check with the relevant authority or venue before the session. Ask permission before bringing clients or substantial equipment into shops, hotels, museums, libraries, restaurants, historic interiors, and other private or controlled properties.
What should I do if the location is crowded or the weather changes?
Prepare two different responses. For crowds, use a nearby composition that preserves the intended scenery without requiring a trip across the city. For severe weather, reschedule, shorten the outing, cancel, or use a pre-approved indoor venue whose access and photography policies have been confirmed.
Also establish a meeting point and communication procedure. If the route falls behind, protect the priority photograph and drop the secondary stop instead of rushing between locations.
The strongest New York photo plan begins with the desired picture, not a race through famous landmarks. Choose one visual priority, group nearby settings into a walkable cluster, and prepare separate responses for crowds and weather. Central Park, DUMBO, Brooklyn Bridge Park, the Brooklyn Bridge, Top of the Rock, and Times Square are valuable for different visual reasons; none needs to be declared universally best.